Usage
- Creating a basic form with Sisitech Forms is straightforward.
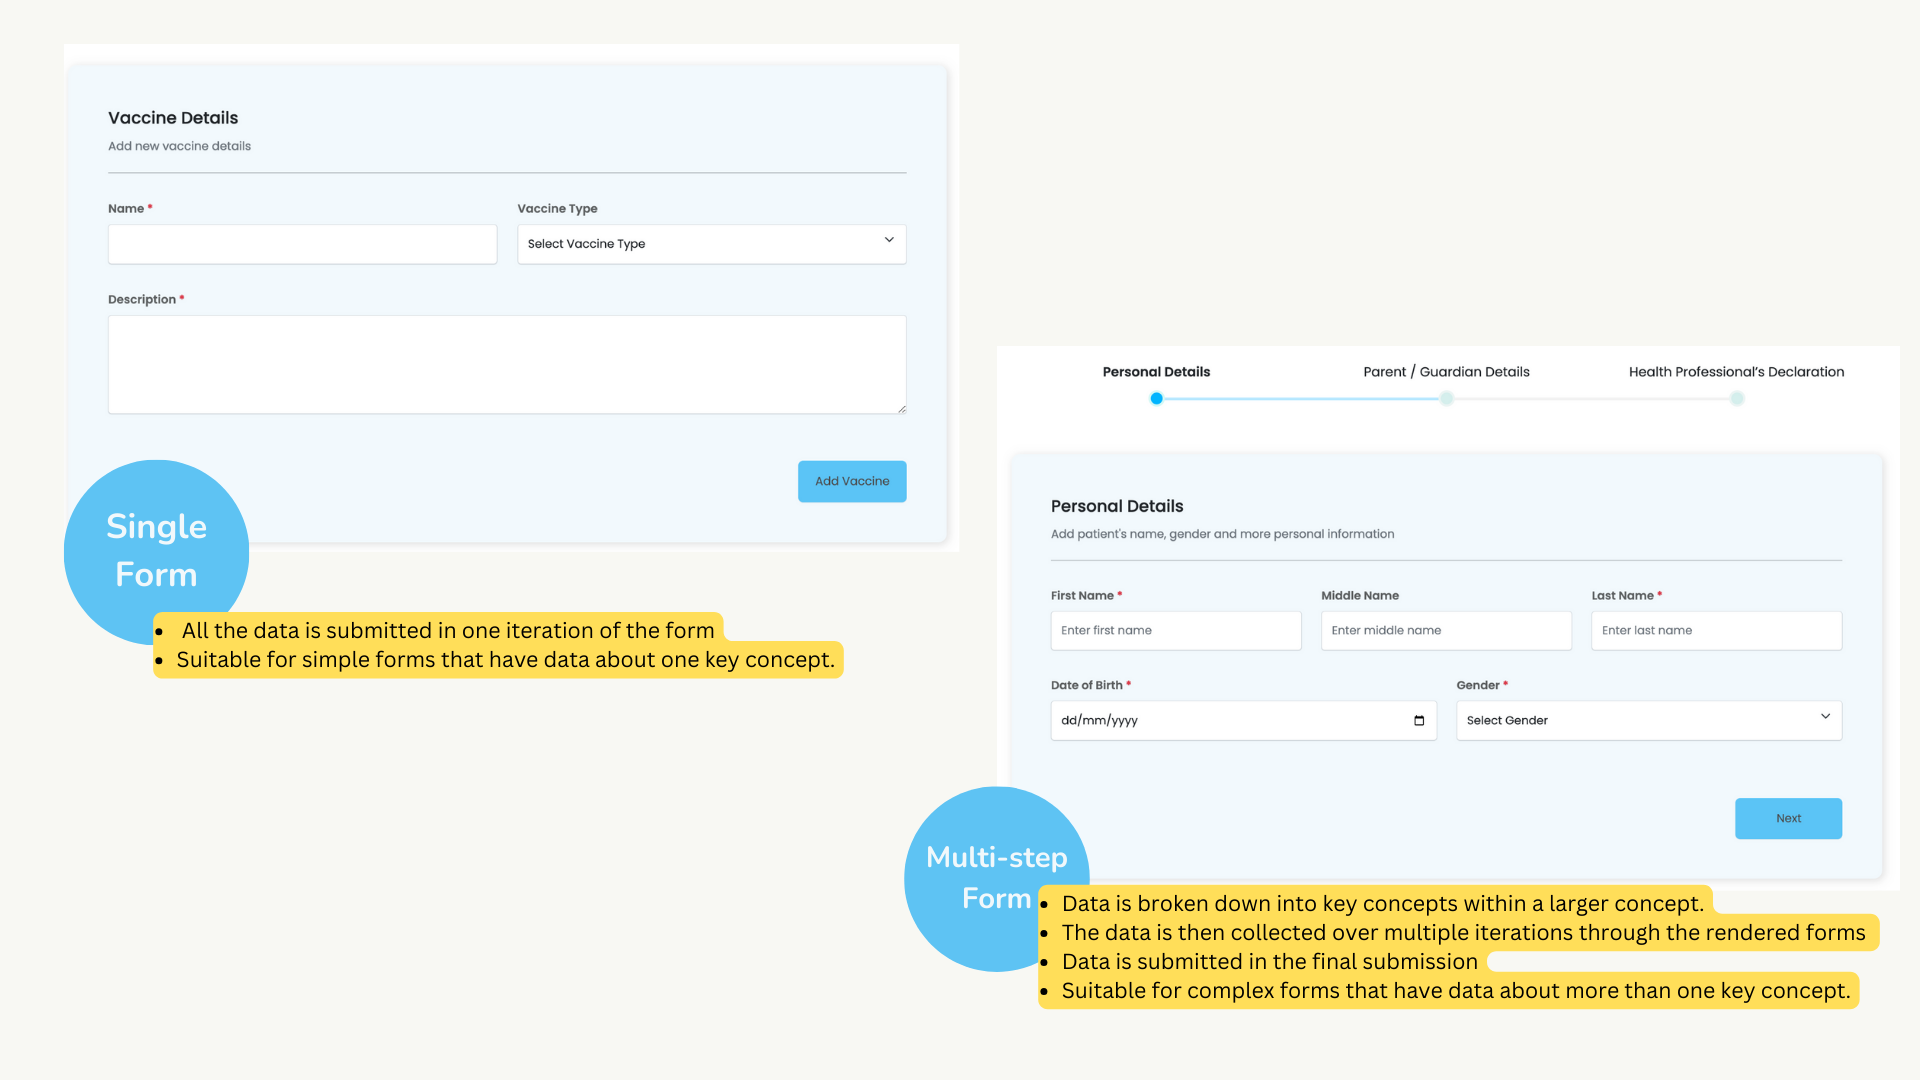
- There are two ways to render myForms i.e the single form or the multi-step form.
- In this tutorial, we will use a hospital records management system to demonstrate the library's usage. The example below shows an example to add a vaccine.
Creating the Form Component
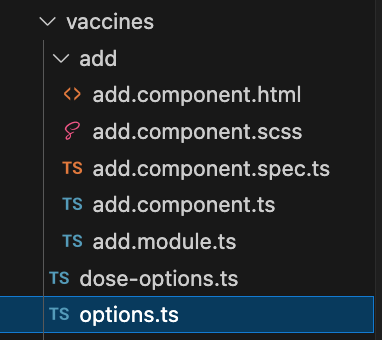
- After creating and serving your angular project, the first step is to create the form component in your desired directory.
- In this case we want to create an add component in the vaccine folder. Navigate to your angular project's root directory and use the Angular CLI to generate a new component named
addas shown:
- Once created, we start by setting up the form fields and integration before finally rendering the html.
- The steps to setting up a functional form using Sisitech forms can be generalized into three key steps:
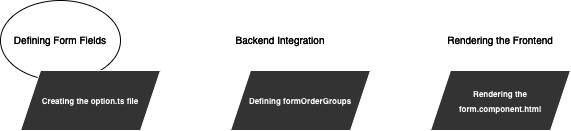
Defining Form Fields
- MyForms uses the data fields defined in the backend models of your project to generate the fields to be rendered on the form.
- MyForms assumes your project is using a Django backend since the form fields are designed to take up the same structure as the options provided for Django model endpoints.
- Once we've created the component, the next step is to setup the options.ts file in your project folder in which we will copy and paste the options data provided by the Django endpoint.
- Next, go to your specific API endpoint and click on the options button to get the options file.
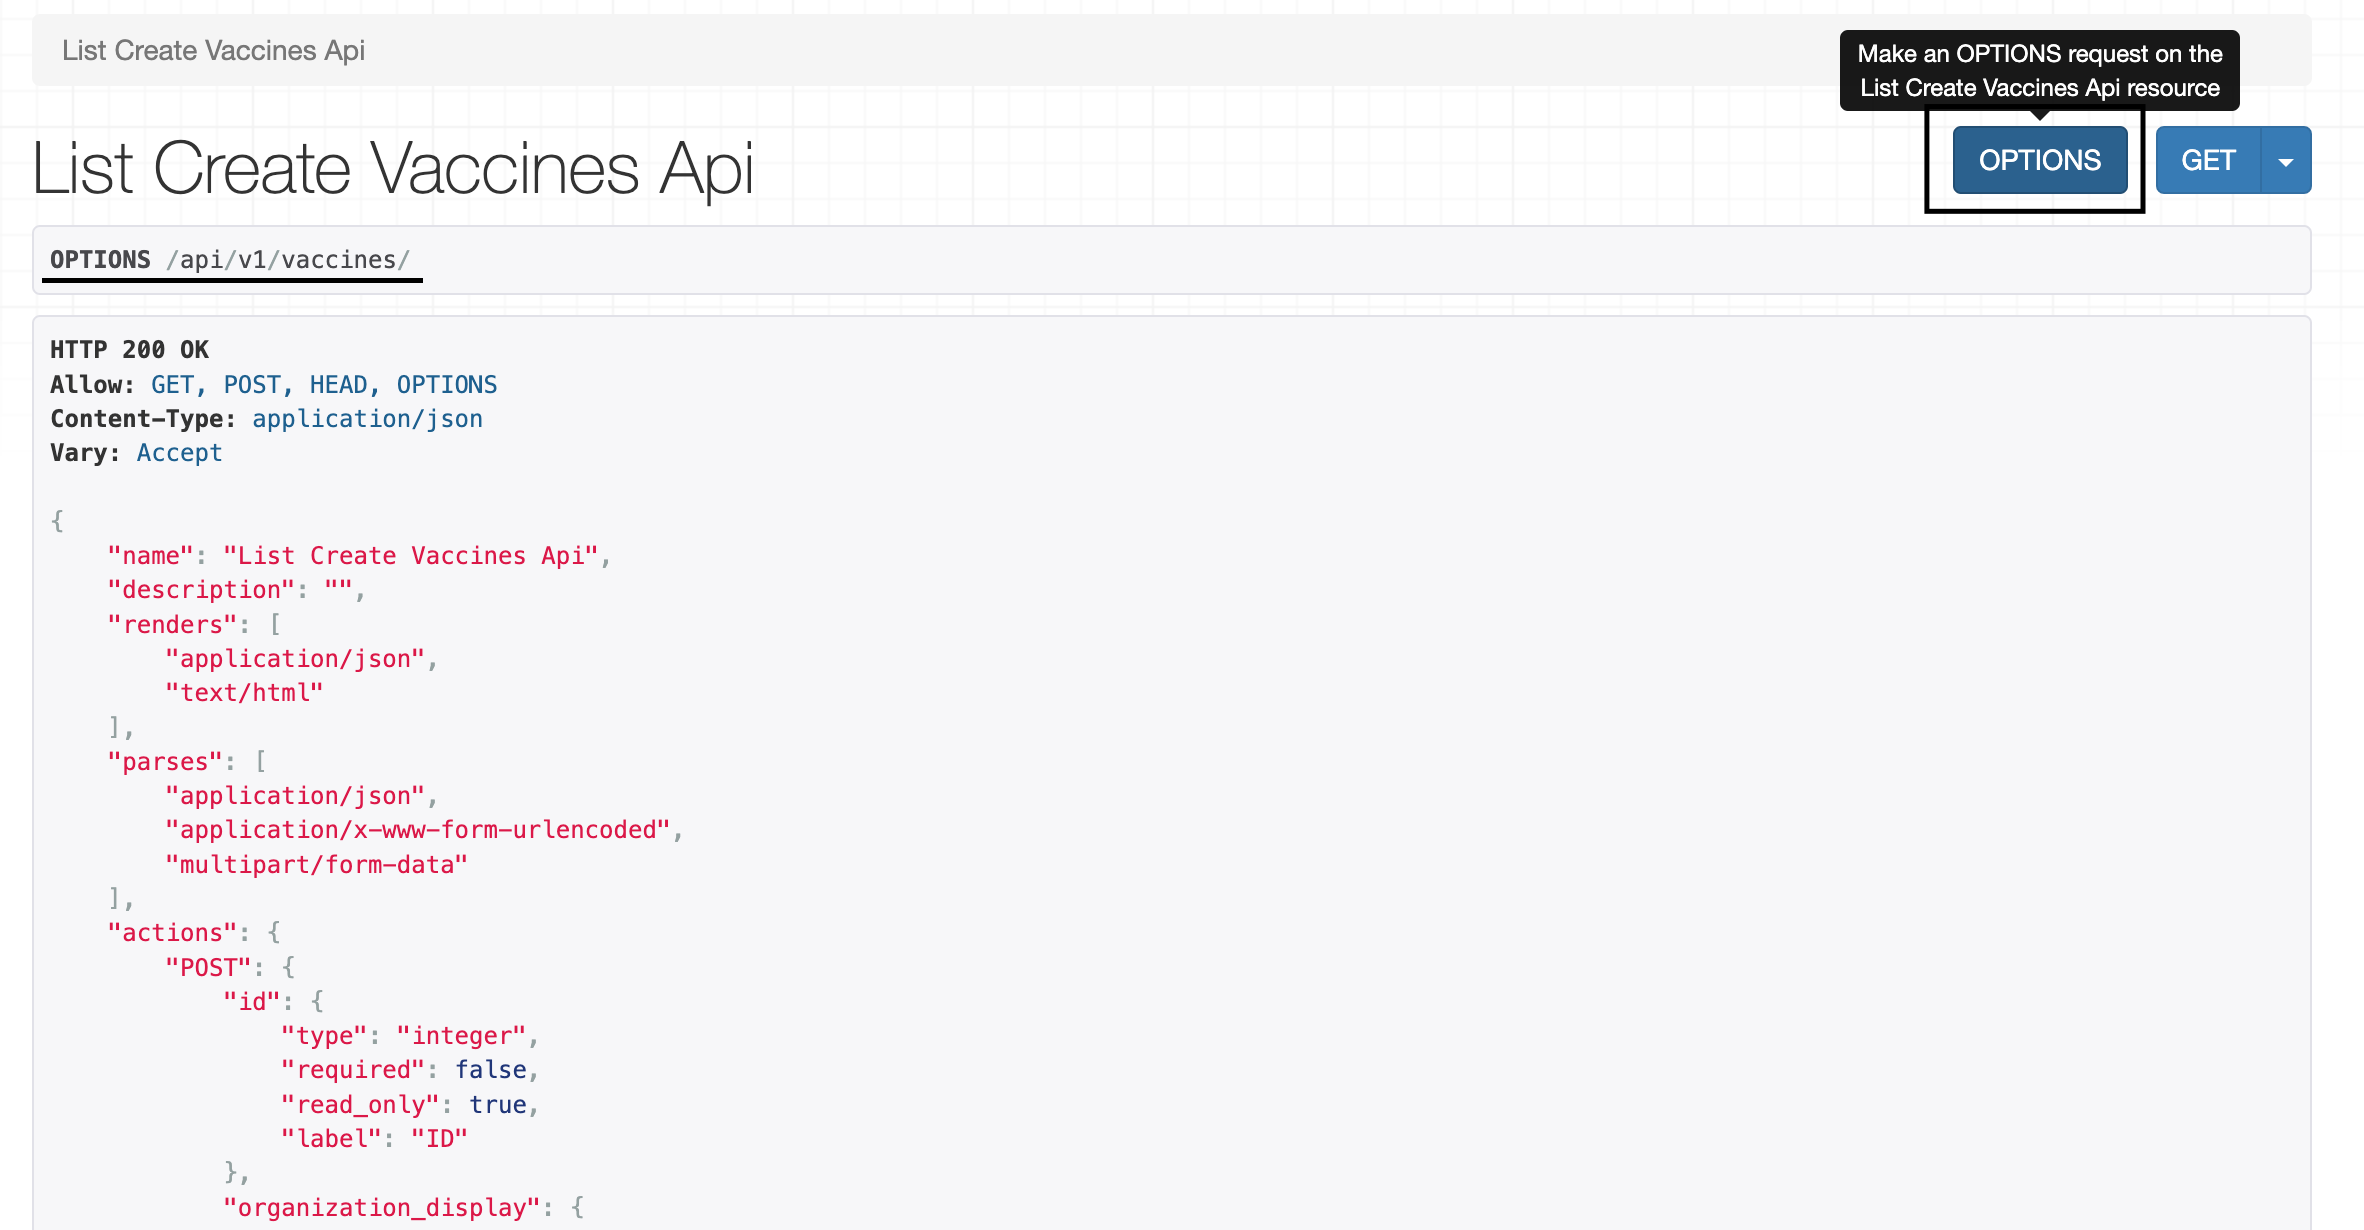
- Once copied, define and export an options object in your options file
- Copy the contents of the response options into your created options.ts file
vaccines/add/options.ts
const filterOptions = {
"name": "List Create Vaccines Api",
    "description": "",
    "renders": [
        "application/json",
        "text/html"
    ],
    "parses": [
        "application/json",
        "application/x-www-form-urlencoded",
        "multipart/form-data"
    ],
    "actions": {
        "POST": {
            "id": {
                "type": "integer",
                "required": false,
                "read_only": true,
                "label": "ID"
            },
            "name": {
                "type": "string",
                "required": true,
                "read_only": false,
                "label": "Name",
                "max_length": 45
            },
            "description": {
                "type": "string",
                "required": true,
                "read_only": false,
                "label": "Description",
                "max_length": 500
            },
            "organization": {
                "type": "choice",
                "required": false,
                "read_only": false,
                "label": "Vaccine Type",
                "choices": [
                    {
                        "value": "G",
                        "display_name": "KEPI Schedule"
                    },
                    {
                        "value": "P",
                        "display_name": "Expanded Schedule"
                    }
                ]
            }
        }
    }
}

export {
    filterOptions
}
- The form fields that will be used to render the form can be seen in the "POST" key of the "actions" dictionary.
- Each key-value pair in this dictionary represents the name of the field as well as the model constraints the field has.
- Once we set up the options.ts file, next is to integrate the myForms library with our project using the options.ts file we just created.
Backend Integration
- The first step in integrating the backend is to set up the API_URL endpoints in the main app.module.ts file.
- Replace the variable API_URL in the app.module.ts page with your API's URL provided and add the myforms module as shown:
- Once the API url endpoints are set, we create the necessary components needed to render myforms in the component.ts file of your form component
- But first, let's understand some key concepts about the working of myforms.
MyForm Inputs & Outputs
- The table below shows the different inputs we need to define in our component.ts file as well as the ones we will pass to the
html module. The required inputs or shown by teh green checkmark.
| Inputs | Is Required | Descripiton | Example |
|---|---|---|---|
| instanceName | ✅ | @Input The name of the form instance |
|
| formItems | ✅ | @Input This is used to pass the exported form options from options.ts |
|
| formGroupOrder | ✅ | @Input An array within an array used to define the fields to be included and their order. More details on this input are explained below. |
|
| name | ✖️ | @Input This is used to pass the exported form options from options.ts |
|
| enableAddAnother | ✖️ | @Input Boolean field that allows you to add another form after submitting the first. |
|
| url | ✖️ | @Input URL path of the API endpoint |
/api/v1/vaccines |
| extraFields | ✖️ | @Input Any constant fields that are not included in the form and may be required by the API an example would be an access token |
{"token":"Ahw7HD7a"} |
| submitButtonText | ✖️ | @Input The text displayed in the form submit button. The default value is Post |
Vaccine , Patient, Schedule |
| instance | ✖️ | @Input - an object provided during update of any previously created instances to trigger edit mode |
|
| submitButtonText | ✖️ | The text displayed in the form submit button before the submit button text (submitButtonText). By default the value is Add, and if an instance is included the value is Update |
Add, Edit, Update |
| isValidationOnly | ✖️ | @Input - used to validate a form without posting to any URL e.g. in a multi-step form |
true or false |
| onValidatedData | ✖️ | @Output - an event triggered on successful validation with the value of the valid form only if isValidationOnly is true |
|
| onPostedData | ✖️ | @Output - an event triggered with the value of the HTTP response from the API with successful status codes (200, 201, 204) |
|
| preSaveDataFunction | ✖️ | @Input - a function that accepts and return a JSON used to manipulate the form data after successful validation before onValidatedData and onPostedData |
|
| isLoading$ | ✖️ | @Output - an event triggered with the value true when a HTTP request is started and false on completion |
|
| httpMethod | ✖️ | @Input - used to override the HTTP request method. Only post, put and patch are supported |
POST, PUT, PATCH |
| httpMethod | ✖️ | @Input - used to override the HTTP request method. Only post, put and patch are supported |
POST, PUT, PATCH |
The FormGroupOrder Array
- A formGroupOrder is an array used to define the fields to be displayed on the form as well as the orde rin which they will be displayed.
- A formGroupOrder can be an array of form field items:
Note
The list of field items represents the form fields that will be rendered on each row of the form as well as the order in which they will appear. A new list of field items listed, means a new row to be rendered on the form.
Caution
Make sure your array within an array formGroupOrder is separated with commas.
- A formGroupOrder can also be an array of MyFormSection objects.
- A MyFormSection object is used to allow for multiple forms in one big form.
- Within a MyFormSection object, you can define the form details for each form within a multi-form setup.
- MyFormSection object takes a title and subtitle for that formSection as well as the formGroupOrder to be displayed in that form as shown:
section1: MyFormSection = {
    title: "Vaccine  Details",
    subTitle: " vaccine details",
    formGroupOrder: [
      [
        'name',
        'organization'],
      ['description']
    ]
  }

  formGroupOrder = [
    this.section1
  ]
Rendering the form
Single Form
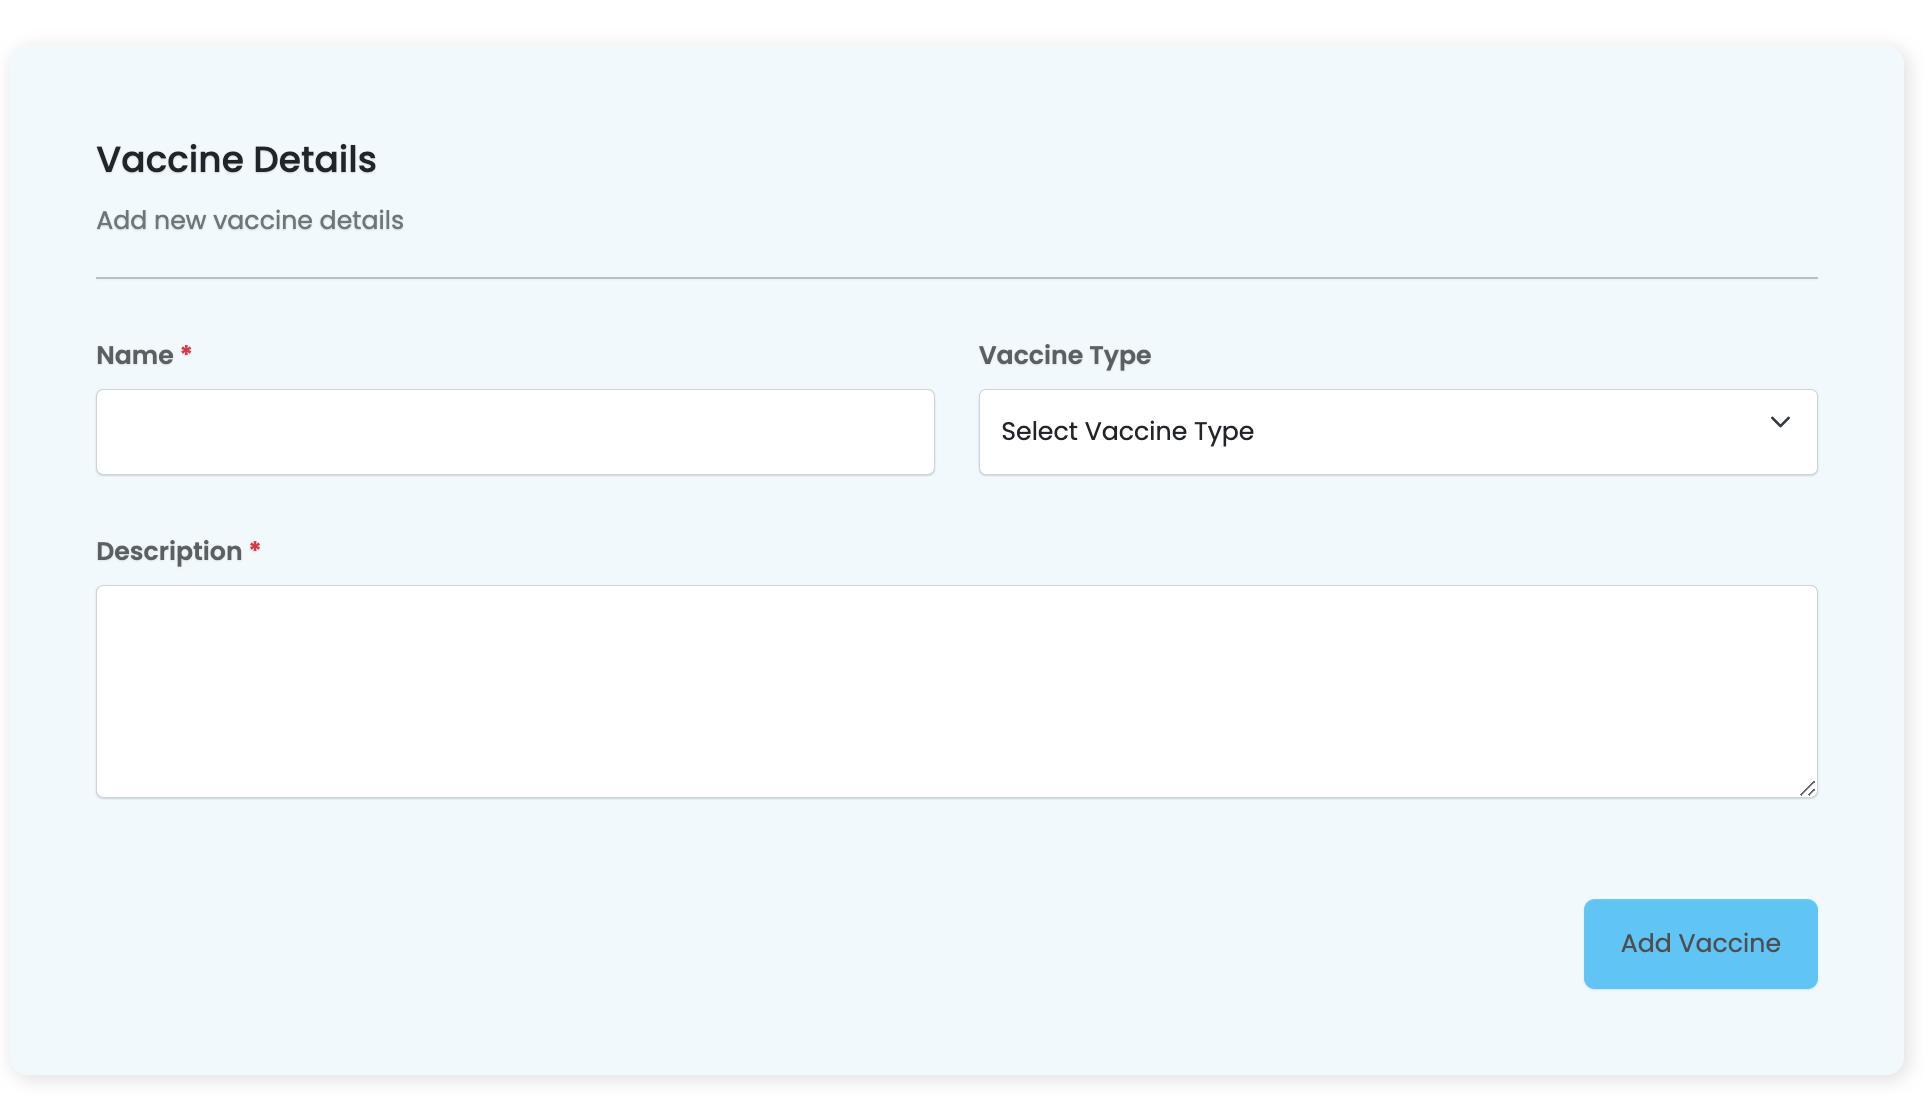
- The code below shows an example for how to set up a single form in html. The different inputs being passed are defined in the table above. We call the
module to define a single form as shown:
vaccines/add/add.component.html
- The inputs being passed above in the html are defined in the component.ts file of this component. The code below shows an example of how these inputs are defined:
  <app-myform instanceName="Vaccine @name#" name="vac" [enableAddAnother]="true" [extraFields]="extra_fields"
      [formItems]="formItems" [url]="url" (onValidatedData)="onValidatedData($event)" [submitButtonText]="'Vaccine'"
      [formGroupOrder]="formGroupOrder" [hideButtons]=false [instance]="instance"
      (onPostedData)="onVaccineCreated($event)">
    </app-myform>
collapseFilters = false
formItems: any = filterOptions;
validateOnly = true
url: string = "api/v1/vaccines/"
extra_fields: any
originalInstance: any
providedInstance: any
id: any = ""

section1: MyFormSection = {
    title: "Vaccine  Details",
    subTitle: " vaccine details",
    formGroupOrder: [
      [
        'name',
        'organization'],
      ['description']
    ]
  }

  formGroupOrder = [
    this.section1
  ]

  ...

  onValidatedData(data: any) {
    console.log(data)
  }

  onVaccineCreated(patient: any) {
    console.log(patient)
    window.history.back();
  }
- We passed the filterOptions we defined in the options.ts file to the formItems variable. As seen, the names within the formGroupOrder are the same names sourced from the options.ts file.
- The final form will be served as follows:
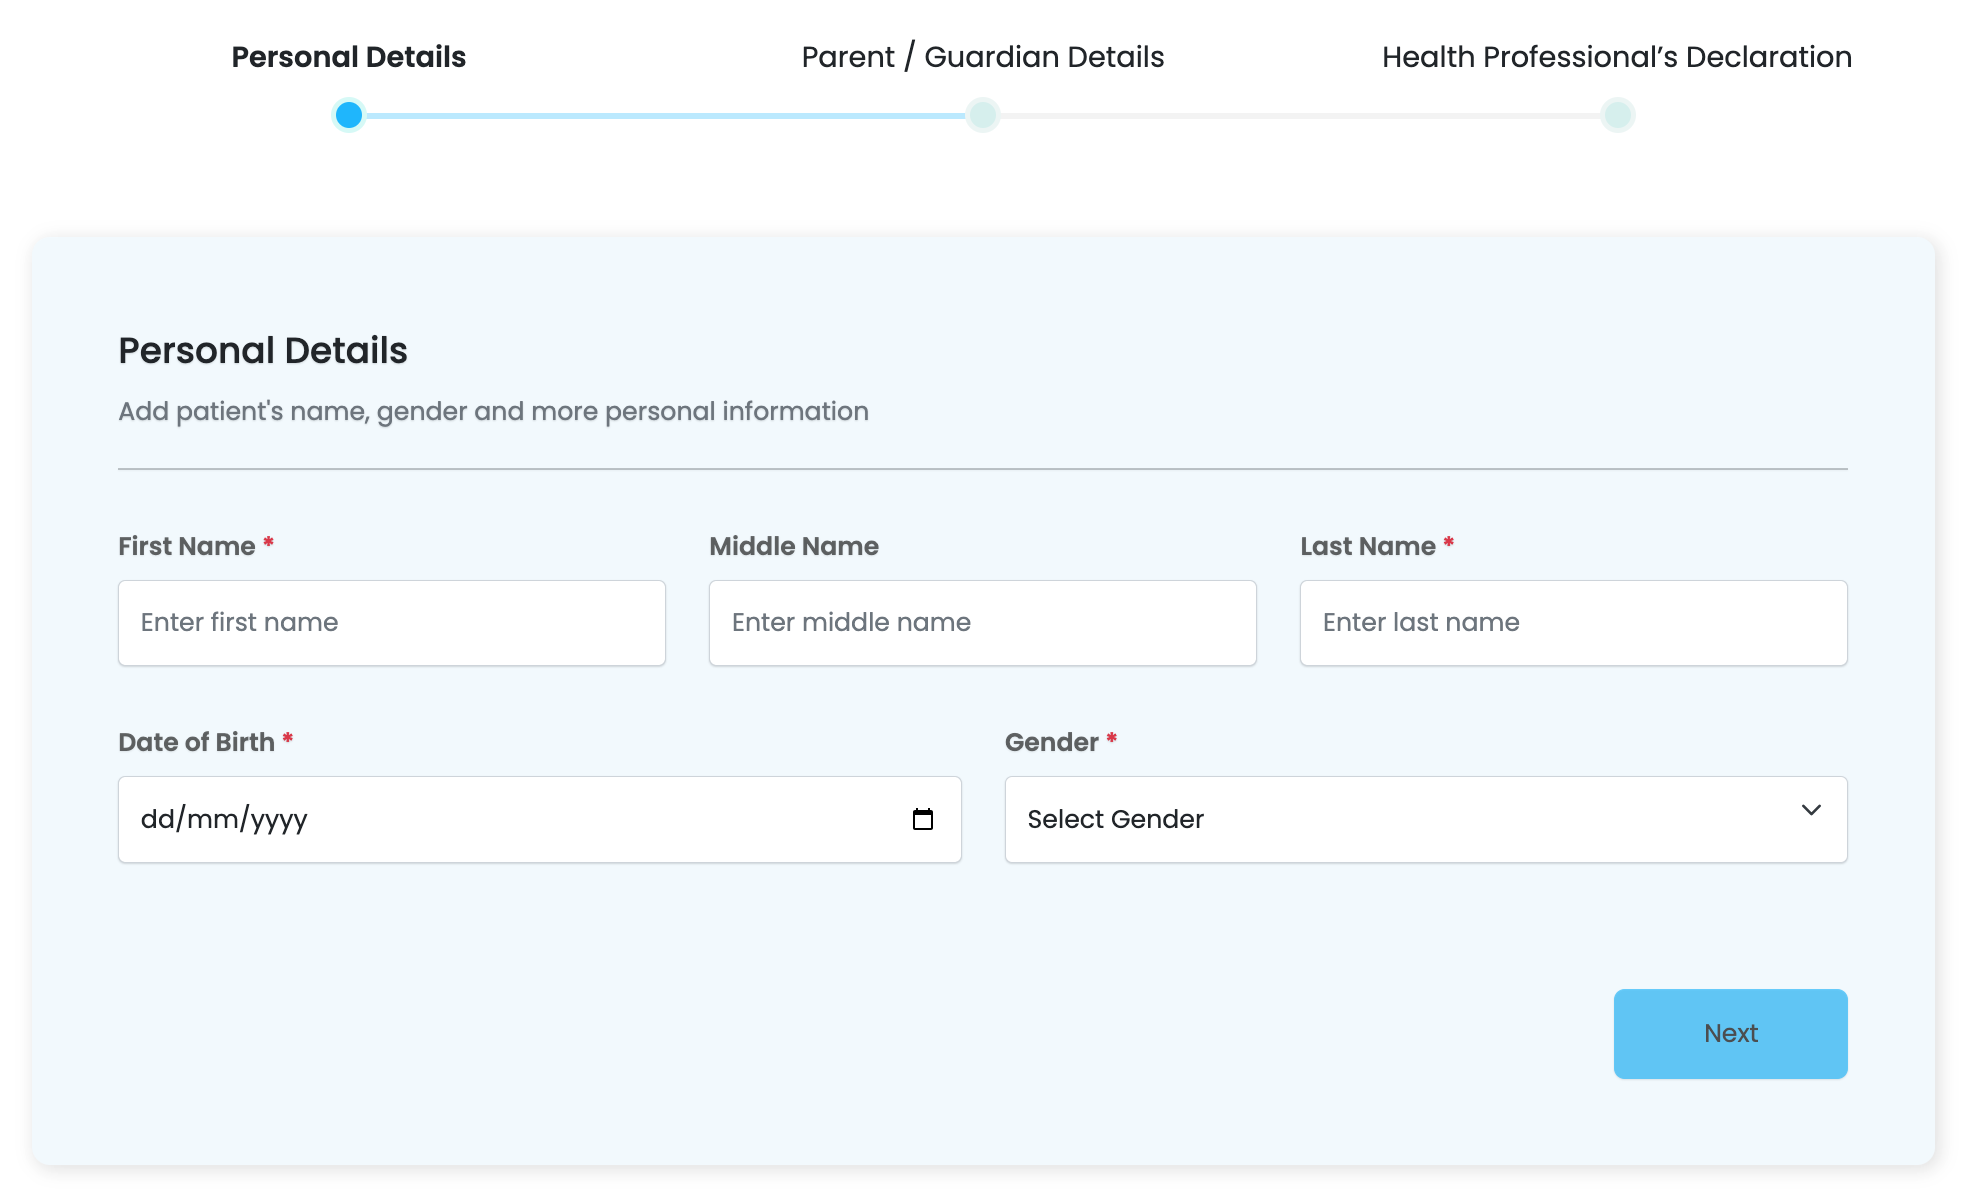
Multi-step Form
- For a multi-step form, we call the
in html as shown. - As you can see, most of the inputs being passed to the multi-step form are being abstarcted in the [options] input to which we pass the multiStepForm variable we will soon define in the component file:
vaccines/add/add.component.html
<sistch-multistep-form [instance]="instance" (onPostedData)="onPatientCreated($event)" [options]="multiStepForm">
</sistch-multistep-form>
- The inputs being passed above in the html are defined in the component.ts file of this component.
- The code below shows an example of how these inputs are defined.
- In this case, we first define each individual section using a MyFormSection object. Once done, we create the multiStepForm variable that houses all our configurations:
  filterOptions: any = filterOptions
  url: string = "api/v1/patients/"
  instance: any

  section1: MyFormSection = {
    title: "Personal Details",
    subTitle: this.actionName + " patient's name, gender and more personal information",
    formGroupOrder: [
      ['first_name', 'middle_name', 'last_name'],
      ['dob', 'gender'],
    ]
  }
  section2: MyFormSection = {
    title: "Parent / Guardian  Details",
    subTitle: this.actionName + " parent or guardian details",
    formGroupOrder: [
      ['guardian_name', 'guardian_email', 'guardian_phone'],
      ['sub_county', 'guardian_relationship']
    ]
  }
  section3: MyFormSection = {
    title: "Health Professional’s Declaration",
    subTitle: "I certify that the information I have provided in this form is true and correct. I have obtained proof of the vaccination(s) given.",
    formGroupOrder: [
      ['medical_license_number'],
      ['i_have_read']
    ]
  }

  sectionFormGroup: MyFormSection[] = [
    this.section1, this.section2
  ]

  multiStepForm: MutliStepForm = {
    url: "api/v1/patients/",
    options: options,
    submitButtonText: "Patient",
    forms: [
      {
        stepTitle: "Personal Details",
        sections: [this.section1]
      },
      {
        stepTitle: "Parent / Guardian  Details",
        sections: [this.section2]
      },
      {
        stepTitle: "Health Professional’s Declaration",
        sections: [this.section3]
      },
    ]
  }

  ...

  onPatientCreated(patient: any) {
    console.log(patient)
    if (patient && patient.alert_notification) {
      patient.alert_notification.message = "Patient Id: @id - @full_name @action#"
    }
    // window.history.back();
    // console.log(this.previousService.getPreviousUrl())

    this.router.navigate([this.previousService.getPreviousUrl()], { state: patient })
  }

  formChanges(form: any) {
    console.log(form)
  }
Useful Links
- Overview: Introduction to myForms.
- Getting Started: Learn how to install and set up Sisitech Forms in your project.
- Under the Hood: Dive into the details of the library's functions, classes, and components.
- Examples: See real-world examples of Sisitech Forms in action.